Windows Setup
| Component of Microsoft Windows | |
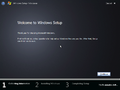
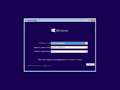
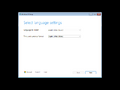
 Windows Setup; language selection in Windows 11 build 26040 | |
| Type | Setup |
|---|---|
| Introduced in | Windows 1.0 |
Windows Setup is the process or program that installs Microsoft Windows onto a computer and depending on the version, partitions the computer's disk drive, chooses the system language and setups keyboard layouts or networks.
Variants[edit | edit source]
16-bit Windows[edit | edit source]
Windows 1.0 featured a very rudimentary installer, which asks for the target drive, directory and hardware configuration, and then proceeds to install the system. There is no option to load custom drivers from the setup and the user instead has to copy the drivers on the disk manually. In order to optimize performance, the installer also combines crucial system files into a single WIN100.BIN file using what is called "Fast Boot". There is no support for changing a single part of the system, as the entire environment has to be clean installed in order to do that, erasing any configuration in the process.
Unlike later versions, the Windows 1.0 setup has no easily accessible settings. Instead, the executable is compiled specifically for each disk size and the available drivers are determined dynamically by the setup without previous configuration.
Windows 2.0 kept a similar user interface for setup as previous versions, although it introduced many back-end changes. Notably, it introduced SETUP.INF, a plaintext configuration file, which contained a list of system files and included drivers, as well as other settings. The setup also now supports loading custom drivers from the application itself. However, Windows 2.x did not support upgrading a previous version of Windows. Any previously installed version of Windows is overwritten, and any settings must be transferred across manually from the WIN.INI file. Windows/386 2.1 and Windows/286 2.1 added an extra step which allowed the user to load Memset, a setup utility which installs the SmartDrive caching program onto the root of the system drive.
Windows 3.0 introduced a new, more advanced installer. The black background for the setup has been replaced with a blue background with a grey bar showing the current tasks that the installation is performing. After the core Windows system files have been copied, it launches Windows to complete Setup. From there, the remaining files are copied and components are set up. This version also introduces the ability to upgrade a previously installed version of Windows by running Setup from within DOS. Upgrading a previous version transfers all its settings stored in the WIN.INI file across to the newer one. Windows 3.1 adds the option for the user to enter their name and company, and Windows for Workgroups 3.1 adds a network setup, which consists of detecting the network adapter and then configuring the network setup, including adapters and protocols. If this is complete, the user will be asked for the network's user name, workgroup and computer name. As the color palette in the VGA display driver changed in Windows 3.1, the setup background, is displayed differently compared to Windows 3.0. SmartDrive is now also installed and configured to run at DOS startup by default. If a network has been configured, net start will also run at startup.
Windows 9x[edit | edit source]
Windows 9x versions do not require an existing version of DOS to install. However, a boot disk was still required in most cases as most Windows 9x installation media was not bootable. The installation process prepares a partition, checks it using ScanDisk, and copies files to the hard disk.
In Windows 9x versions, .CAB files are used for the installation, CAB files are a simple compressed file format that doesn't lose any information used by Microsoft for installers and windows setup. Mostly known .CAB installation files include:
- WIN95_*.CAB, WIN98_*.CAB (WIN9X_*.CAB in early Windows 98 builds) and WIN_*.CAB: They contain the main system apps and files.
- DRIVER*.CAB: Contains the driver files for Windows.
- NET*.CAB: Contains networking and internet components.
- MINI.CAB: Contains basic files required to start the installation from within DOS. This environment is based on Windows 3.1.
If starting the installation process from DOS, the Windows 3.1-based environment in the MINI.CAB file is used to start Setup. During this stage, the user configures various settings of the installation, and the Windows system files are copied to the hard disk. However, Setup can also be run from within an existing Windows 3.1 or 9x environment, skipping this portion. Once the files are copied, Setup restarts the computer, sets up devices and configures system settings.
Starting with Windows 9x, a specific key is needed to be entered to set up Windows. This started with a Beta Site ID and a password for early Windows 95 pre-release builds, and continued with a CD key for retail CD releases of Windows 95 and NT 4.0, as well as a Certificate of Authencity (COA) key for OEM releases. Both have been replaced by a product key in Windows 98 and 2000, which also debuted on the floppy release of the former.
In Windows Me, a new setup wizard was introduced, which followed the visual guidelines of Wizard97, replacing the former scheme from Windows 95.
Retail releases of Windows 98 and Me do ask for credential information during the first part of setup, while in OEM releases, the user will be asked after a reboot before the second part starts, allowing OEMs to easily prepare a computer with an existing Windows installation.
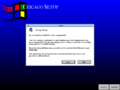
Upgrade releases of Windows do additionally check for an existing installed version of Windows. This Upgrade Compliance Check (UCC) starts in Windows 95 before the setup wizard launches, while in Windows 98 and Me, it is part of it. If the UCC fails to find an existing installation, it asks for the first setup diskette or the CD-ROM of the previous release. If no existing installation is specified, setup will exit. (For Windows 95, the user may enter an verification password instead if requested.) The UCC only triggers when setup is started from DOS, as it is not needed if setup is started from an existing Windows installation.
Among the installation files, a dummy file called msbatch.inf is included, which, if being replaced by a proper file, can be used to install Windows in unattended mode.
Windows NT[edit | edit source]
During its development, Windows NT adopted a modified version of the Windows 3.1 setup process. Similarly to it, the setup configuration is stored in INI-formatted text files, although unlike its DOS-based counterpart the text mode configuration uses a separate configuration file. All files use 8.3 format filenames for compatibility with MS-DOS, often with the last extension character replaced with an underscore to mark that the file is compressed, with the full name stored inside the setup configuration. Although original media usually comes with most files compressed, the compression is optional.
The operating system files are stored in a folder named according to the target platform along with the setup configuration. This made it possible for the same disc to contain installation files for multiple architectures, which in turn allowed all versions to be shipped in the same package up to Windows NT 4.0. As the files for 32-bit x86 systems were stored in the I386 directory, this particular setup process is often referred to as "i386 setup", although other directory names were used for other platforms, including: ALPHA for DEC Alpha systems, MIPS for MIPS, PPC for PowerPC, PC98 (or NEC98 in Windows 2000) for NEC PC-98, IA64 for Itanium and AMD64 for 64-bit x86. Media for the latter two architectures also include a I386 directory, although unlike early versions it does not contain a self-contained 32-bit x86 build, but rather the files required for WoW64 with the file names prefixed by the letter W.
The installation on x86 platforms can be started multiple ways, the most straightforward of which is to boot from the included installation media. For Windows NT 3.51 and older, this requires the use of boot floppies, while Windows NT 4.0 and later supports booting directly from the installation CD-ROM. The installation files can also be copied to the hard drive by using the executables included on the installation CD-ROM, namely WINNT.EXE for use from MS-DOS and WINNT32.EXE (introduced in Windows NT 3.5) from an existing Win32 environment. While WINNT32.EXE was merely a Win32 variant of WINNT.EXE until Windows NT 4.0, it turned into an upgrade wizard in Windows 2000, which evaluates the upgraded operating system and points out any incompatibilities before booting into the setup proper. Windows XP is the last version to have the ability to boot with floppy boot disks into setup, these however were only available for download by Microsoft, as the ability to create boot floppies with WINNT.EXE has been removed since Windows 2000. Said version was also the last to ship with a set of physical boot floppy disks.
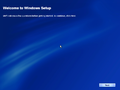
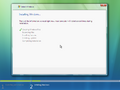
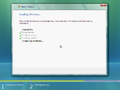
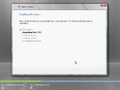
Similarly to Windows 3.1, the installation process consists of two major phases. The first phase usually runs in text mode and prepares the environment for the second GUI stage to run. In Windows NT 3.1, this text mode environment runs entirely on ARC firmware (and its emulator on x86), using only ARC API calls to function (on x86 it also additionally implements the exported APIs of SCSIPORT.SYS, to allow third party SCSI controller drivers to execute under this environment). In later versions, it runs under a cut-down NT environment, booting with the multiprocessor kernel (ntkrnlmp.exe) on all systems, even those with only a single processor. This can be easily seen at the boot screen, where "MultiProcessor Kernel" is displayed next to the amount of RAM. When booting into the first stage, the setup determines the hardware configuration and loads drivers as specified in the configuration. It then proceeds to start the minimal NT environment on the install media, which had its Session Manager component replaced with a simple native application that passes control to the setup driver (setupdd.sys). When it finishes loading, it displays a welcome screen which allows the user to continue the installation or repair an existing copy of Windows. The Recovery Console can also be invoked at this point in Windows 2000 and later. When upgrading to Windows XP or Windows Server 2003, this stage runs in 16-color graphical mode, shows a static billboard together with a progress bar and animation and accepts no input, although it falls back to text mode when an error is encountered, the same when uninstalling Windows XP and reinstating Windows 9x.
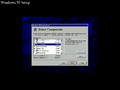
The next pages of the first stage include the license agreement and partition management. After the setup checks the partition for errors, it copies a more complete system to the disk and prepares the system for the second stage to run by generating the registry and writing the boot loader. The system is then rebooted into the second phase, which runs in graphical mode and installs the rest of the operating system, as well as configures the network, date/time and asks for a product key.
While the second phase mostly consisted of a wizard until Windows 2000, Windows XP extended it into a full-screen assistant, praising the features and improvements of the operating system. The wizard, however, still appeared after device installation completed and when starting an upgrade. The older design overall could be reactivated by editing the setup information file or invoking the mini-setup option in SysPrep, which is intended for factory preinstallation by OEMs, as it additionally displays the license agreement that way.
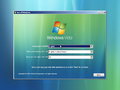
Starting with Windows 2000, the Network Identification Wizard runs at first boot to configure user name and password, along with a choice to log on to a specific user automatically. This evolved into a full-on out-of-box experience with Windows XP, allowing the user to easily configure network settings, user accounts and, starting with Service Pack 2, also Automatic Updates. When upgrading from Windows 9x, the user will be prompted to enter a password for the Administrator account since the Administrator account does not exist in Windows 9x.
Windows Vista and 7[edit | edit source]
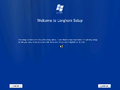
Windows Longhorn build 4001 introduced the WIM installation format. This installation format boots the operating system via WinPE which launches the main setup user interface. The user configures multiple aspects of the installation, such as what SKU of Windows the user would like to install, what disk or partition Windows should be installed, and whether the user would like to perform an upgrade or clean installation. The setup is booted via the \sources\boot.wim file on the installation media.
The install process works by deploying a pre-packed WIM image (\sources\install.wim) to the hard disk where Windows should be installed. Early builds of the development reset reused the i386 setup, as the WIM installation method was not reimplemented until build 5048. Starting with this build, the setup is also booted from the install image itself. The image index determines what SKU of Windows will be installed. From Windows 8 onwards, the DISM command line tool is used to deploy the image to the location where Windows is installed. After the WIM image is applied, the installer creates boot files on the hard disk, and restarts the machine so that devices can be set up, and the OOBE can be run. If there is an already existing version of Windows on the hard disk where the user chose to install Windows, the existing Windows installation is moved into the \Windows.old directory.
The older Recovery Console previously accessible from text-mode setup was replaced by the Windows Recovery Environment, a GUI-based diagnostic tool suite used for troubleshooting system-level issues that prevent a Microsoft Windows installation from booting properly.
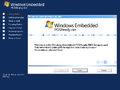
Although the present-day WIM format was first introduced with Windows Vista, Windows XP-based Windows releases can also be packaged in WIM format. Examples can be seen in the Windows Embedded for Point of Service and Windows Fundamentals for Legacy PCs operating systems. Setup graphical assets are stored in spwizimg.dll on Windows Vista and later; Windows Longhorn pre-reset builds store them in win32ui.dll and win32uitheme.dll.
Windows Vista Beta 2 and RC builds from the vbl_media_ehome or vbl_media_ehome_dev build labs have the original setup launcher replaced with the "Media Center Diamond Take Home DVD Launcher", which installs Windows Vista clean in unattended mode and with Windows Media Center diagnostic and debug tools. A functionally similar launcher existed in builds of Windows XP Media Center Edition 2005, however with it being run in kernel mode, as the user mode is not initialized in Windows XP's setup.
In Windows Vista Service Pack 1, the background for both the Setup screen, and the System Background has been changed.
Windows 8 onwards[edit | edit source]
Since Windows 8, support for solid compression (via the LZMS algorithm) was implemented into the WIM image format in the form of the Electronic Software Download (ESD) file format. Such images can be created by passing in the recovery compression type into the arguments for the /Capture-Image DISM commandlet. ESD images cannot be modified unless re-exported into a WIM image using LZX compression (via the fast/max compression types).
Solid WIM images can additionally have parts of the file encrypted using AES, where the AES keys are themselves encrypted by a public RSA key; this was first instituted within the Web Installers provided as part of the Windows 8 Consumer Preview and later build releases. These images are decrypted via the Windows Download Platform (WinDlp.dll) using the corresponding private key, which may be additionally be embedded within the respective WIM image XML metadata (via function CDlpTransformRecoverCrypto::SaveKeyToWim()) and/or subsequently parsed by function CDlpTransformRecoverCrypto::GetKeyFromWim(), called from function CDlpTransformRecoverCrypto::CryptWimFile() (which is primarily responsible for decrypting the actual image's contents).
This practice continues to persist in newer Windows versions via the Windows Media Creation Tool, a modified version of the Web Installer designed for generating installation media that can be ran off of removable devices, and was also further practiced in early releases of Windows 10 up through the Anniversary Update by encrypting the contents of both internal and external preview releases, after which Microsoft then later switched to the Unified Update Platform to distribute new operating system builds.
In Windows 8.x, it is not possible to escape the product key page unless the user enters a proper product key, creates a proper ei.cfg file in the sources folder, uses DISM to apply the Windows image, or an answer file. Later revisions of Windows 8.1's setup accept Windows 8 product keys. Windows 10's setup accepts product keys from Windows 7 and newer.
Since the initial Windows 11 release, additional checks to the setup process have been implemented into the upgrade appraiser library to account for the then-new system requirements, which required a system with UEFI, a TPM 2.0 module and Secure Boot support; these requirements were met with backlash from various users as it leaves many older systems that fully support Windows 10 ineligible for the free upgrade.[1]
The legacy Windows Vista/7 setup user interface was later deprecated with the introduction of the modernized Windows 8 setup user interface into the Windows Preinstallation Environment setup package as part of build 26040's release, slightly modified to support disk partitioning capabilities and EFI boot support. The legacy setup user interface can still be invoked by selecting "Launch the legacy experience" option in the list of supported installation paths.
Gallery[edit | edit source]
16-bit Windows[edit | edit source]
Setup in Windows 1.0 Development Release 5

Setup in Windows 1.02
Setup in Windows/386 2.11
Setup in Windows 3.00a
Setup in Windows 3.1


Windows 9x[edit | edit source]
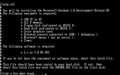
Setup in Windows 95 build 58s
Setup in Windows 95 build 122
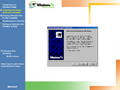
Setup in Windows 95 and OEM Service Releases
Setup in Windows 98 build 1400
Setup in Windows 98 and SE
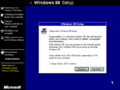
Setup in Windows Me


Windows NT[edit | edit source]
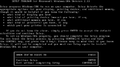
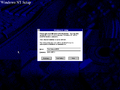
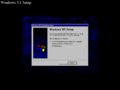
Setup in Windows NT 3.5
Setup in Windows NT 3.51
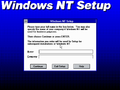
Setup in Windows NT 4.0
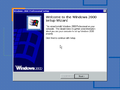
Setup in Windows 2000
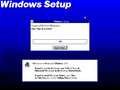
Setup in Windows XP build 2257

Setup in Windows XP build 2416
Setup in Windows XP
Setup in Windows Server 2003
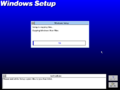
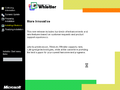
Setup in Windows Longhorn build 4001
Setup in Windows Longhorn build 4011
Setup in Windows Longhorn build 4093
Setup in Windows Vista build 5098
Setup in Windows Vista build 5284
"Media Center Diamond Take Home DVD Launcher" in Windows Vista build 5329
Language and region selection in Windows Vista build 6000.16386
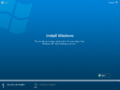
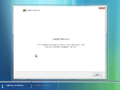
Setup in Windows Vista
Setup in Windows Vista SP1
Setup in Windows Server 2008
Setup in Windows Embedded POSReady 2009
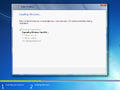
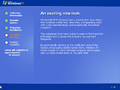
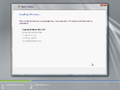
Setup in Windows 7
Setup in Windows Server 2008 R2
Setup in Windows 8 and Windows Server 2012
Setup in Windows 8.1, Windows Server 2012 R2 and above
Language and region selection in Windows 10
Language and region selection in Windows 11 (original release)
"This PC can't run Windows 11" screen in Windows 11
Install now in Windows Server 2022
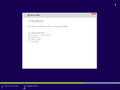
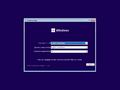
Windows Setup; language selection in Windows 11 build 26040

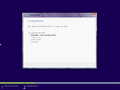
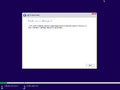
Disk configuration page in Windows 11 build 26040


References[edit | edit source]
- ↑ Claburn, Thomas. Microsoft releases Windows 11 Insider Preview, attempts to defend labyrinth of hardware requirements, The Register. 28 June 2021.