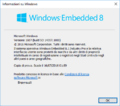
Windows 10 build 14357.1000
| Build of Windows 10 Anniversary Update | |
 | |
| OS family | Windows 10 (NT 10.0) |
|---|---|
| Version number | 10.0 |
| Build number | 14357 |
| Build revision | 1000 |
| Architecture | x64 |
| Build lab | rs1_release |
| Compiled on | 2016-05-27 |
| Expiration date | |
| Timebomb | 2016-07-15 (+49 days) |
| About dialog | |

Windows 10 build 14357.1000 is a build of Windows 10 Anniversary Update. The build includes a bug in the win32kfull.sys library that must be patched through means of debugging; a workaround is discussed later in the article.
It is notable for being one of the few Windows 10 builds to be made available in the form of unstaged installation media; all client editions available in the Windows 10 source tree at the time of compilation (albeit labeled as Longhorn, a holdover that was never corrected internally) are available for the user to pick from and install during setup, in turn building a complete Windows image from scratch from a set of components through the use of the Windows Component-Based Servicing (CBS) stack.
However, most built-in Universal Windows Platform applications such as the Windows Store, Groove Music and Sticky Notes are not present by default as these are manually installed when preparing pre-staged media for distribution, leaving only the necessary applications required by Windows, such as the Windows Shell Experience Host (responsible for handling the Action Center and Start menu), its Search component (and by extension Cortana), Microsoft Edge, Azure Active Directory enrollment brokers, and the Settings application.
The Italian x64 compile of this build was uploaded to BetaArchive on 14 May 2020.
Editions and keys[edit | edit source]
The following SKUs are installable in this build:
| Edition / SKU Name | Key |
|---|---|
| Starter[a] | D6RD9-D4N8T-RT9QX-YW6YT-FCWWJ |
| Starter N[a] | 3NFXW-2T27M-2BDW6-4GHRV-68XRX |
| Home | YTMG3-N6DKC-DKB77-7M9GH-8HVX7 |
RT (CoreARM)
|
9V76T-NJ3VH-2D2WT-M84D4-F6Y9P |
Home with Bing (CoreConnected)
|
GVYN6-BGJDK-RVPMY-YCX4G-D3V2V |
Home China (CoreCountrySpecific)
|
N2434-X9D7W-8PF6X-8DV9T-8TYMD |
Home China with Bing (CoreConnectedCountrySpecific)
|
97N7Q-YMY7Q-8MV3C-T97YT-PDJXD |
| Home N | 4CPRK-NM3K3-X6XXQ-RXX86-WXCHW |
Home N with Bing (CoreConnectedN)
|
23TYN-4T6M8-J86QW-7F2RB-YWQGX |
| Home Single Language | BT79Q-G7N6G-PGBYW-4YWX6-6F4BT |
Home Single Language with Bing (CoreConnectedSingleLanguage)
|
Q6MYN-Y8D89-GHVBR-KXTK3-RJQG6 |
| Education | YNMGQ-8RYV3-4PGQ3-C8XTP-7CFBY |
| Education N | 84NGF-MHBT6-FXBX8-QWJK7-DRR8H |
Embedded Industry Pro (EmbeddedIndustry)
|
7CNDP-3R3J2-VM48R-Y4DW8-6MRQ7 |
Embedded Industry RT (EmbeddedIndustryA)
|
NJJ9T-Q7C3Y-QGYG2-HMMX7-M4FRK |
Embedded Industry Pro Evaluation (EmbeddedIndustryEval)
|
3K92D-PNKHR-WTFHP-27JXM-K74Q6 |
Embedded Industry Enterprise (EmbeddedIndustryE)
|
23N3K-29JDQ-JBQHC-48TKF-2J974 |
Embedded Industry Enterprise Evaluation (EmbeddedIndustryEEval)
|
4TDK2-N89GW-CCCV7-633QX-RM3V2 |
| Enterprise | NPPR9-FWDCX-D2C8J-H872K-2YT43 |
| Enterprise Evaluation | VPMWD-PVNRR-79WJ9-VVJQC-3YH2G |
Enterprise LTSC (EnterpriseS)
|
NK96Y-D9CD8-W44CQ-R8YTK-DYJWX |
Enterprise LTSC Evaluation (EnterpriseSEval)
|
JBGN9-T2MH3-2YV7W-WBWHM-FGFCG |
| Enterprise Subscription | 9NVV6-PPYVR-Q6FRM-9JWDY-8FHYW |
| Enterprise N | WGGHN-J84D6-QYCPR-T7PJ7-X766F |
| Enterprise N Evaluation | MNXKQ-WY2CT-JWBJ2-T68TQ-YBH2V |
Enterprise LTSC N (EnterpriseSN)
|
RW7WN-FMT44-KRGBK-G44WK-QV7YK |
Enterprise LTSC N Evaluation (EnterpriseSNEval)
|
7M88N-MTVMR-VC46G-4K4R6-KTQF7 |
| Enterprise Subscription N | N8RDF-KR7J8-9W4M8-R6W7F-PPRBX |
| Pro | VK7JG-NPHTM-C97JM-9MPGT-3V66T |
Pro China Only (ProfessionalCountrySpecific)
|
HNGCC-Y38KG-QVK8D-WMWRK-X86VK |
Pro for Education (ProfessionalEducation)
|
8PTT6-RNW4C-6V7J2-C2D3X-MHBPB |
Pro for Education (ProfessionalStudent)[b]
|
V3NH2-P462J-VT4G4-XD8DD-B973P |
Pro LTSC (ProfessionalS)
|
3NF4D-GF9GY-63VKH-QRC3V-7QW8P |
| Pro with Media Center[c] | DCNJ8-44Y2Y-Q3JTT-RGX4F-K4TWP |
Pro for Workstation (ProfessionalWorkstation)
|
RGT4M-CYNRC-2JMPJ-GRVWC-7YMDX |
| Pro N | 2B87N-8KFHP-DKV6R-Y2C8J-PKCKT |
Pro N for Education (ProfessionalEducationN)
|
GJTYN-HDMQY-FRR76-HVGC7-QPF8P |
Pro N for Education (ProfessionalStudentN)[b]
|
QJFNY-8Q8BQ-6WQH8-9J3K6-CGXVJ |
Pro LTSC N (ProfessionalSN)
|
KNDJ3-GVHWT-3TV4V-36K8Y-PR4PF |
Pro N for Workstation (ProfessionalWorkstationN)
|
H7XNC-JYM86-7B27X-8MJ9W-TKFX9 |
| Pro Single Language | G3KNM-CHG6T-R36X3-9QDG6-8M8K9 |
Team (PPIPro)
|
XKCNC-J26Q9-KFHD2-FKTHY-KD72Y |
Bugs and quirks[edit | edit source]
Installation[edit | edit source]
This build bugchecks with code SYSTEM_SERVICE_EXCEPTION during boot due to a bug in the way the win32kfull.sys system library obtains a handle for fonts drawn by the Graphics Device Interface (GDI) in function win32kfull!NtGdiGetTextFaceW. It can be bypassed by debugging the library and patching the failing function through WinDbg during the boot process.[3] Alternatively, replacing win32kfull.sys and its corresponding security catalog file with a different version can also bypass the bug.
Bypassing the bug using WinDbg[edit | edit source]
- Extract the BCD file from the installation media (located in
\Bootfor legacy BIOS boot, or in\EFI\Microsoft\Bootfor UEFI boot) and put the file into any folders. - Open Command Prompt with elevated privileges and execute the following commands:
# Enable debugging
bcdedit /store <BCD path> /debug {default} on
# Enable loading of test-signed drivers
bcdedit /store <BCD path> /set {default} testsigning on
# Disable integrity checks
bcdedit /store <BCD path> /set {default} nointegritychecks on
# Enable the kernel debugger using a serial connection; % stands for the chosen COM port number (1 by default)
bcdedit /store <BCD path> /dbgsettings serial debugport:% baudrate:115200
- Overwrite the original BCD file in the installation media with the modified one.
- If installing on a virtual machine, disable Secure Boot and set up the serial port:
- For VMware Workstation on Windows host: Add a serial port via the "Add..." button, change the connection type to "Use named pipe", enter the pipe's name (Format:
\\.\pipe\<pipe name>, e.g.\\.\pipe\windows), then choose "This end is the Server, The other end is an application". - For VirtualBox on Windows host: Check "Enable Serial Port" in the "Serial Ports" section, select "Host Pipe", uncheck "Connect to existing pipe/socket", and enter the pipe's name (Format:
\\.\pipe\<pipe name>). - For Hyper-V: execute the following commands in PowerShell:
# Disable Secure Boot (for generation 2 VMs only)
Set-VMFirmware –Vmname <VM name> –EnableSecureBoot Off

# Add a COM port with a named pipe; % stands for the chosen COM port number (1 by default)
Set-VMComPort –VMName <VM name> % \\.\pipe\<pipe name>
- For VMware Workstation on Windows host: Add a serial port via the "Add..." button, change the connection type to "Use named pipe", enter the pipe's name (Format:
- Start WinDbg and attach it to the machine:
- Press Ctrl+K to open the kernel debugging dialog/page.
- Pick the "COM" tab, check the "Reconnect" option (and "Pipe" if it's used), enter the port's or pipe's name in the "Port" box, and click the "OK" button.
- Boot the machine from the patched installation media.
- In debugger's command window, press Ctrl+Alt+V to enable verbose mode. When the final force-unload event occurs, quickly press Ctrl+Break or select Break in the Debug menu, then execute the following commands:
sxe ld win32kfull.sys
g
- When
win32kfull.syshits a breakpoint, execute the following commands:bp win32kfull!NtGdiGetTextFaceW+0x304b e win32kfull!NtGdiGetTextFaceW+0x304e d6 e win32kfull!NtGdiGetTextFaceW+0x3076 c6 bc 1 bd 0 g
- Install the system as normal and shut the machine down before Windows Setup is attempting to reboot the system. Alternatively, end the
setup.exeprocess from Task Manager (with "Installazione di Windows" description) before the system reboots. - Repeat steps 1 and 2 for the BCD file on the system partition before turning on (or restart if
setup.exehas ended) the machine again. - Repeat steps 7 and 8 whenever the system is booting.
Miscellaneous[edit | edit source]
- Some editions in this build such as Pro with Media Center and Embedded Industry Pro utilize older Windows 8.1 branding as they were discontinued during development of the original Windows 10 release.
- The out-of-box experience may crash when creating a new account on the LTSC variations of the Pro and Enterprise SKUs. It can be bypassed by either entering audit mode Ctrl+⇧ Shift+F3, using an unattended installation XML file to skip the OOBE or by adding a new user account through the
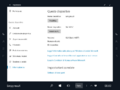
netplwizutility (and assigning the respective administrative user groups) and manually modifying the assembled Windows image to mark the installation as completed. - Several pages in the Settings application do not work:
- Camera, Microphone and other subpages under the Privacy page in all SKUs except for the Team edition.
- The main Windows Update page in the LTSC variants of the Pro and and Enterprise editions, including their N and Evaluation counterparts.
Gallery[edit | edit source]
Windows Setup[edit | edit source]
Autorun

SKU selection
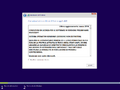
End-user license agreement


Out-of-box experience[edit | edit source]

Privacy settings
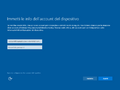
Domain join (Team SKU)


Interface[edit | edit source]
Pro SKU[edit | edit source]

Boot screen
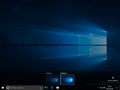
Action Center
Task view

Cortana
Microsoft Edge


Embedded Industry Pro SKU[edit | edit source]
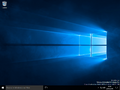
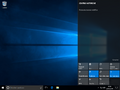
Desktop
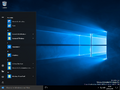
Start menu
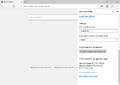
winver


Team SKU[edit | edit source]

Lock screen

Desktop
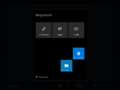
Start menu
About Windows


Notes[edit | edit source]
- ↑ 1.0 1.1 The Starter edition (and its N counterpart), last included in Windows 7, had since been internally repurposed during Windows 8 development to act as a base for new and existing Windows client SKUs. The Web Server edition would also be identically repurposed during development of its server counterpart for both Desktop Experience and Core editions, although Standard Server would later take its place as the base for Server Core editions during the late development phases of Windows Server 2016, specifically during Redstone 1 development.
- ↑ 2.0 2.1 OEM-specific Windows 8.1 edition released exclusively for the HP Pro Tablet 10 EE G1;[1][2] not to be confused with the newer
ProfessionalEducation(N)SKUs first introduced in Windows 10. - ↑ Despite the SKU name, the Windows Media Center application had since been removed from the Windows 10 source tree and is not present in its respective edition manifest or within the component store. The latest available build to include installable binaries for Media Center is build 10586 (th2_release), of which are present in the official repair content source packages for that build.
References[edit | edit source]
- ↑ Schaffhauser, Dian. HP Rolls Out Quad-Core Tablets for Education with Windows or Android, The Journal. 22 January 2015.
- ↑ Hewlett-Packard. HP Pro Tablet 10EE device specifications (pp. 2). December 2014.
- ↑ How to install Windows 10 build 14357.1000 and .1001