Windows 8 build 7898 (fbl_core1_kernel_npc_ext)
| Build of Windows 8 | |
 | |
| OS family | Windows NT |
|---|---|
| Version number | 6.2 |
| Build number | 7898 |
| Build revision | 0 |
| Architecture | x86, ARM32 (ARMv7) |
| Build lab | fbl_core1_kernel_npc_ext |
| Compiled on | 2010-12-09 |
| Expiration date | |
| Timebomb | 2011-07-01 (+204 days) |
| SKUs | |
| Starter (E, N) Home Basic (E, N) Home Premium (E, N) Professional (E, N) Enterprise (E, N) Ultimate (E, N) | |
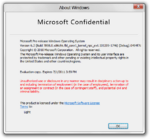
| About dialog | |
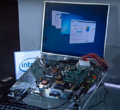
Windows 8 build 7898 is an internal build of Windows 8. This build was first shown running on an Intel Atom SoC at the CES 2011 trade show to demonstrate increased support for low-power system-on-chip devices, along with build 7867 and 7900.[1][2]
The original partner drop for both the retail and debug client releases of this build's unstaged ARMv7 installation media and Preinstallation Environment, including software development kits and raw symbol sets for Nvidia were shared on 11 September 2024, along with build 7957, while the x86 checked/debug compile was shared on 13 October 2024. The Qualcomm drop was uploaded on 4 December 2024.
ARMv7 Compile Installation[edit | edit source]
QEMU installation guide:
Prerequisites[edit | edit source]
The following requirements used in order to install this build onto a virtual machine are listed below:
- The QEMU v6.1.0 Tegra 2 WoA fork that simulates a real-world Nvidia Tegra 250 development kit, modified to run early Windows on ARM builds
- As of 2024, continuous integration (CI) is currently only set up to automatically produce Windows builds. The fork must be manually compiled from source by using a different operating system like macOS or Linux.
- The required patched EFI firmware capsule images (originally from build 7822), to be placed in the QEMU installation directory in a new folder named
fw - Two virtual hard disk images (for storing the installation media and the OS install)
Precautions[edit | edit source]
- The emulator may quit when a system reboot is initiated. This is an intentional design decision implemented by Microsoft as restarts are treated as full shutdowns by the Tegra 250 HAL, and cannot be worked around.
- In rare edge cases, Secure Digital MultiMediaCard (SDMMC) emulation may not be reliable and can possibly corrupt the main OS disk partition midway through image deployment or feature staging. Re-attempting the below instructions by first formatting the main OS partition and then modifying the setup BCD store to use one CPU core (located as
EFI\Microsoft\Boot\BCDin the installation media) via the command below may help significantly improve the chances of a successful installation, at the expense of additional time due to the lack of multi-threading:bcdedit /offline /store M:\EFI\Microsoft\Boot\BCD /set {default} NUMPROC 1 - USB HID device emulation is unstable and will occasionally result in devices failing to register any user inputs. To restore input, switch to the QEMU compatibility monitor (Ctrl+Alt+2) and run the following commands:
device_del kbd
device_add usb-kbd,id=kbd
- For builds prior to 7957 (excluding builds 7792 and 7822), it is critical that the Windows Setup boot image be substituted with the Windows Preinstallation Environment image from the original partner drop (ordinarily located in the
winpeorwoapedirectories), as the Setup boot image does not contain the required hardware abstraction layer (HAL) extensions, and will therefore cause the operating system to immediately bugcheck with codeHAL_INITIALIZATION_FAILEDas soon as the boot sequence starts. - This guide is not for build 7915 due to it being designed to run on Texas Instruments OMAP4 and won't run on the Tegra 2 QEMU. It is required to use QEMU-woa instead.
Instructions[edit | edit source]
These instructions assume that the user has an elevated command prompt window open.
Create the needed virtual disk images through the diskpart utility by running the below script; they will be created under a directory in the C: drive named ARM8. The INSTALL, MainOS and EFI system partitions will be respectively mounted under drive letters F and P.
create vdisk file="C:\ARM8\Setup.vhd" maximum=4096 type=expandable
select vdisk file="C:\ARM8\Setup.vhd"
attach vdisk
convert gpt
create partition primary
format quick fs=fat32 label=INSTALL
assign letter=M
create vdisk file="C:\ARM8\Main.vhd" maximum=65536 type=expandable
select vdisk file="C:\ARM8\Main.vhd"
attach vdisk
convert gpt
create partition efi size=100
format quick fs=fat32 label=EFIESP
create partition primary
format quick fs=ntfs label=MainOS
assign letter=P
exit
Depending on the users' desired build flavor (free or checked), copy the contents of the installation media over to the INSTALL partition. Extract the needed EFI boot manager (\Windows\Boot\EFI\bootmgfw.efi) from the Windows PE or Windows Setup boot image to INSTALL, as EFI\Boot\bootarm.efi.
Eject all currently attached virtual disks from the machine, and paste and run the contents of the below script onto a batch file within the QEMU installation directory, replacing FWType with either the 78xx variant firmware (for early builds up to 7898) or the multi variant (for builds 7898 through build 7996):[a]
set BL=".\fw\HARMONY.fd.FWType"
set MAIN="C:\ARM8\Main.vhd"
set SETUP="C:\ARM8\Setup.vhd"

qemu-system-arm ^
    -M tegra2-qemu -m 1G -accel tcg,thread=multi ^
    -bootloader %BL% ^
    -device usb-tablet,id=mouse -device usb-kbd,id=kbd ^
    -drive if=sd,index=0,format=vpc,file=%SETUP% ^
    -drive if=sd,index=1,file=%MAIN% ^
    -serial null -nic none ^
    -s ^
start D:\sources\setup.exe
Immediately after completing the first phase of setup, remove the SD slot for the installation media and boot into the operating system by using the below batch script configuration:[a]
set BL=".\fw\HARMONY.fd.FWTYPE"
set MAIN="C:\ARM8\Main.vhd"

qemu-system-arm ^
    -M tegra2-qemu -m 1G -accel tcg,thread=multi ^
    -bootloader %BL% ^
    -device usb-tablet,id=mouse -device usb-kbd,id=kbd ^
    -drive if=sd,index=0,file=%MAIN% ^
    -serial null -nic none ^
    -s ^
Continue installing the operating system through normal means.
Editions and keys[edit | edit source]
The following SKUs are installable in this build:
| Edition / SKU Name | Key |
|---|---|
| Starter[b] | 7Q28W-FT9PC-CMMYT-WHMY2-89M6G |
| Starter E[b] | BRQCV-K7HGQ-CKXP6-2XP7K-F233B |
| Starter N[b] | D4C3G-38HGY-HGQCV-QCWR8-97FFR |
| Home Basic | YGFVB-QTFXQ-3H233-PTWTJ-YRYRV |
| Home Basic E | VTKM9-74GQY-K3W94-47DHV-FTXJY |
| Home Basic N | MD83G-H98CG-DXPYQ-Q8GCR-HM8X2 |
| Home Premium | RHPQ2-RMFJH-74XYM-BH4JX-XM76F |
| Home Premium E | 76BRM-9Q4K3-QDJ48-FH4F3-9WT2R |
| Home Premium N | D3PVQ-V7M4J-9Q9K3-GG4K3-F99JM |
| Professional | HYF8J-CVRMY-CM74G-RPHKF-PW487 |
| Professional E | 3YHKG-DVQ27-RYRBX-JMPVM-WG38T |
| Professional N | BKFRB-RTCT3-9HW44-FX3X8-M48M6 |
| Enterprise | H7X92-3VPBB-Q799D-Y6JJ3-86WC6 |
| Enterprise E | H3V6Q-JKQJG-GKVK3-FDDRF-TCKVR |
| Enterprise N | BQ4TH-BWRRY-424Y9-7PQX2-B4WBD |
| Ultimate | D4F6K-QK3RD-TMVMJ-BBMRX-3MBMV |
| Ultimate E | TWMF7-M387V-XKW4Y-PVQQD-RK7C8 |
| Ultimate N | HTJK6-DXX8T-TVCR6-KDG67-97J8Q |
CES 2011 demo differences[edit | edit source]
Various aspects of this build were either changed or disabled during the CES 2011 demonstration, two of which are likely a result of file replacement originating from newer builds:
- The characteristic User Tile seen in builds 7785 through the earlier compile of this build is disabled.
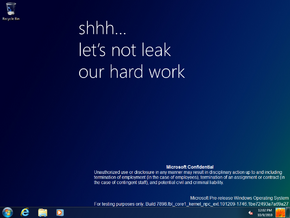
- The Windows Fingerprinting Service is disabled, as evidenced by the lack of the Microsoft Confidential leak warning in the watermark.
- The desktop background was changed to the one seen in the RTM build of Windows 7, in place of the blue-green gradient Milestone 1 wallpaper that was used since build 7762.
Changes[edit | edit source]
Redpill[edit | edit source]
Pattern login now works in this build. However, to set a pattern, a password must be created, otherwise it fails to create due to the patterns not matching. Removing the password will still keep pattern login, but choosing the password option instead will instantly log in to the user's account, due to the password being removed. Additionally, when re-logging in, it will keep using the password option and therefore, instantly log in to the user's account.
A user tile is now located at the top of the start screen filled with the user's profile picture, replacing the Search button, as well as a volume icon.
Miscellaneous[edit | edit source]
- The unredpilled Start Menu has no applications pinned by default.
- The Gaelic keyboard layout is now referred to as Scottish Gaelic.
Bugs and quirks[edit | edit source]
Setup[edit | edit source]
- The last word of status messages shown when starting Setup and before the computer reboots into OOBE is cut off.
Shell[edit | edit source]
- Enabling
EnableAccentcauses rendering issues. - The Start screen may be unresponsive for a minute after login.
- The Desktop tile will show the Windows 7 default wallpaper after first logging in.
Login screen[edit | edit source]
- Trying to open the Power menu from the redpilled login screen won't work, and it'll cause it to crash and restart instead.
Themes[edit | edit source]
- The title bar and watermark uses the Arial font due to a typo in the
aero.msstylesandaerolite.msstylesfiles. - Only the top portion of the window frame is blurred when using the Windows Aero theme, leaving the side borders transparent.
- The Windows Basic and the High Contrast themes do not render properly due to the enforcement of the DWM Aero theme.
Gallery[edit | edit source]
x86 variant[edit | edit source]
Redpill[edit | edit source]
Interface[edit | edit source]
ARM32 variant[edit | edit source]
Redpill[edit | edit source]
Out-of-box experience[edit | edit source]
Interface[edit | edit source]
CES 2011 still frames[edit | edit source]
Notes[edit | edit source]
- ↑ 1.0 1.1 If utilizing the quad-core variant of the Tegra 2 WoA fork, the machine configuration in the batch script must be modified to address 2 GB of RAM, and the patched
2gEFI firmware capsules must also be used to start up the virtual machine. Themulti2gcombination can be used to immediately boot into builds 8020 through late 81xx; if this combination is not being used, then necessary registry modifications against theSYSTEMhive to load Tegra 2 HAL extension IDsVEN_ra2.&DEV_0002(HalExtTegra2.dll) andVEN_ra2.&DEV_0003(HalExtTegra2Dma.dll; in later builds,HalExtTegraDma.dll) are required. - ↑ 2.0 2.1 2.2 The Starter edition (and its N and E counterparts), last included in Windows 7, had since been internally repurposed during Windows 8 development to act as a base for new and existing Windows client SKUs. The Web Server edition would also be identically repurposed during development of its server counterpart for both Desktop Experience and Core editions, although Standard Server would later take its place as the base for Server Core editions during the late development phases of Windows Server 2016, specifically during Redstone 1 development.


