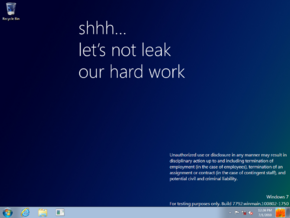
Windows 8 build 7792
| Build of Windows 8 | |
 | |
| OS family | Windows NT |
|---|---|
| Version number | 6.1 |
| Build number | 7792 |
| Build revision | 0 |
| Architecture | ARM32 (ARMv7) |
| Build lab | winmain |
| Compiled on | 2010-08-02 |
| Expiration date | |
| Timebomb | 2010-10-01 (+60 days) |
| SKUs | |
| Starter (N, E) Home Basic (N, E) Home Premium (N, E) Professional (N, E) Enterprise (N, E) Ultimate (N, E) | |
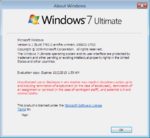
| About dialog | |
Windows 8 build 7792 is a build of Windows 8. A setup file for this build in the ARM32 architecture was uploaded to Internet Archive on 2 July 2023, and the rest of the build was uploaded on 13 August 2024. It is currently the earliest available build of Windows to be compiled for the ARMv7 architecture.
Prior to its leak, a low-quality camera recording of the build, which showed off a DirectX 9 sample application running on a Nvidia Tegra 250 Harmony Reference Platform, was uploaded by former Windows division president Steven Sinofsky on 30 October 2022 along with additional footage of build 7867 in issue 104 of their account of events during his time at Microsoft, titled Hardcore Software.[1][2]
The Driver Development Kit of this build was mentioned in the NVIDIA source code leak from 28 February 2022 as an include directory in the Wi-Fi driver compilation log file located at dev\gpu_drv\stage_rel\drivers\tegra\platform\drivers\network\wifi\athlib\host\hif\sdio\buildchk_win8_arm.log.
Installation[edit | edit source]
QEMU installation guide:
Prerequisites[edit | edit source]
The following requirements used in order to install this build onto a virtual machine are listed below:
- The QEMU v6.1.0 Tegra 2 WoA fork that simulates a real-world Nvidia Tegra 250 development kit, modified to run early Windows on ARM builds
- As of 2024, continuous integration (CI) is currently only set up to automatically produce Windows builds. The fork must be manually compiled from source by using a different operating system like macOS or Linux.
- The required patched EFI firmware capsule images (originally from build 7822), to be placed in the QEMU installation directory in a new folder named
fw - Two virtual hard disk images (for storing the installation media and the OS install)
Precautions[edit | edit source]
- The emulator may quit when a system reboot is initiated. This is an intentional design decision implemented by Microsoft as restarts are treated as full shutdowns by the Tegra 250 HAL, and cannot be worked around.
- In rare edge cases, Secure Digital MultiMediaCard (SDMMC) emulation may not be reliable and can possibly corrupt the main OS disk partition midway through image deployment or feature staging. Re-attempting the below instructions by first formatting the main OS partition and then modifying the setup BCD store to use one CPU core (located as
EFI\Microsoft\Boot\BCDin the installation media) via the command below may help significantly improve the chances of a successful installation, at the expense of additional time due to the lack of multi-threading:bcdedit /offline /store M:\EFI\Microsoft\Boot\BCD /set {default} NUMPROC 1 - USB HID device emulation is unstable and will occasionally result in devices failing to register any user inputs. To restore input, switch to the QEMU compatibility monitor (Ctrl+Alt+2) and run the following commands:
device_del kbd
device_add usb-kbd,id=kbd
- For builds prior to 7957 (excluding builds 7792 and 7822), it is critical that the Windows Setup boot image be substituted with the Windows Preinstallation Environment image from the original partner drop (ordinarily located in the
winpeorwoapedirectories), as the Setup boot image does not contain the required hardware abstraction layer (HAL) extensions, and will therefore cause the operating system to immediately bugcheck with codeHAL_INITIALIZATION_FAILEDas soon as the boot sequence starts. - This guide is not for build 7915 due to it being designed to run on Texas Instruments OMAP4 and won't run on the Tegra 2 QEMU. It is required to use QEMU-woa instead.
Instructions[edit | edit source]
These instructions assume that the user has an elevated command prompt window open.
Create the needed virtual disk images through the diskpart utility by running the below script; they will be created under a directory in the C: drive named ARM8. The INSTALL, MainOS and EFI system partitions will be respectively mounted under drive letters F and P.
create vdisk file="C:\ARM8\Setup.vhd" maximum=4096 type=expandable
select vdisk file="C:\ARM8\Setup.vhd"
attach vdisk
convert gpt
create partition primary
format quick fs=fat32 label=INSTALL
assign letter=M
create vdisk file="C:\ARM8\Main.vhd" maximum=65536 type=expandable
select vdisk file="C:\ARM8\Main.vhd"
attach vdisk
convert gpt
create partition efi size=100
format quick fs=fat32 label=EFIESP
create partition primary
format quick fs=ntfs label=MainOS
assign letter=P
exit
Depending on the users' desired build flavor (free or checked), copy the contents of the installation media over to the INSTALL partition. Extract the needed EFI boot manager (\Windows\Boot\EFI\bootmgfw.efi) from the Windows PE or Windows Setup boot image to INSTALL, as EFI\Boot\bootarm.efi.
Eject all currently attached virtual disks from the machine, and paste and run the contents of the below script onto a batch file within the QEMU installation directory, replacing YYYY-MM-DD with a date which is prior to the build’s built-in timebomb expires and FWType with either the 78xx variant firmware (for early builds up to 7898) or the multi variant (for builds 7898 through build 7996):[a]
set BL=".\fw\HARMONY.fd.FWType"
set MAIN="C:\ARM8\Main.vhd"
set SETUP="C:\ARM8\Setup.vhd"

qemu-system-arm ^
    -M tegra2-qemu -m 1G -accel tcg,thread=multi ^
    -bootloader %BL% ^
    -device usb-tablet,id=mouse -device usb-kbd,id=kbd ^
    -drive if=sd,index=0,format=vpc,file=%SETUP% ^
    -drive if=sd,index=1,file=%MAIN% ^
    -serial null -nic none ^
    -s ^
    -rtc base=YYYY-MM-DD,clock=vm ^
start D:\sources\setup.exe
Immediately after completing the first phase of setup, remove the SD slot for the installation media and boot into the operating system by using the below batch script configuration:[a]
set BL=".\fw\HARMONY.fd.FWTYPE"
set MAIN="C:\ARM8\Main.vhd"

qemu-system-arm ^
    -M tegra2-qemu -m 1G -accel tcg,thread=multi ^
    -bootloader %BL% ^
    -device usb-tablet,id=mouse -device usb-kbd,id=kbd ^
    -drive if=sd,index=0,file=%MAIN% ^
    -serial null -nic none ^
    -s ^
    -rtc base=YYYY-MM-DD,clock=vm ^
Continue installing the operating system through normal means.
Components[edit | edit source]
Due to the earliness of the build, there are some strange components present, or not present:
Media contents[edit | edit source]
- x86 BIOS
bootmgris present in the root of the image; despite not being present anywhere else - ARMv7
bootmgfw.efiis not present in\efi\boot, although it is present in the WIM images.
Component store[edit | edit source]
- An old CMIv2-style component store is present (containing Windows Foundation components only) alongside the newer CBS component store.
- The .NET Framework is not present, despite components depending on it (like PowerShell) being present
- The Windows 7 games are not present, despite some DLLs specific to them being present.
- This build predates Warbird being ported to ARMv7; as such all software licensing components are not obfuscated.
- This build predates HAL extensions; as such there are two HALs present, one for Tegra 2 and one for OMAP3.
- The Windows Search indexing engine does not exist at this stage in development.
Hidden features[edit | edit source]
PDF Reader[edit | edit source]
A preliminary version of the Immersive Reader is included and is accessible by applying the following registry value and running C:\Windows\System32\glcnd.exe with a PDF file as an argument:
Windows Registry Editor Version 5.00

[HKEY_LOCAL_MACHINE\SOFTWARE\Microsoft\Windows\CurrentVersion\Applets\Paint\Capabilities]
"CLSID"="{D3E34B21-9D75-101A-8C3D-00AA001A1652}"
Webcam Capture Application[edit | edit source]
An early version of the webcam capture application is included and is accessible by applying the following registry value and running C:\Windows\System32\Webcam.exe:
Windows Registry Editor Version 5.00

[HKEY_LOCAL_MACHINE\SOFTWARE\Microsoft\Windows NT\CurrentVersion\GRE_Initialize]
"RemoteFontBootCacheFlags"=dword:0000100f
Captures are saved to %USERPROFILE%\Pictures\Webcam.
Ribbon UI[edit | edit source]
The Ribbon version of Windows Explorer is also included. It can be enabled by applying the following registry value:
Windows Registry Editor Version 5.00

[HKEY_CLASSES_ROOT\CLSID\{4F12FF5D-D319-4A79-8380-9CC80384DC08}]
"AppID"="{9198DA45-C7D5-4EFF-A726-78FC547DFF53}"
Bugs and quirks[edit | edit source]
Boot process[edit | edit source]
- The boot environment goes into an infinite loop if the second stage boot application fails.
- This can be fixed by patching the infinite loop instruction to
mov sp, r4.
- This can be fixed by patching the infinite loop instruction to
- The kernel only uses the EFI framebuffer for the boot screen. SOS mode and bugcheck text printing is broken due to the unsupported
bootvid.dllbeing used in these cases.
Control Panel[edit | edit source]
- The Personalization Control Panel will crash
explorer.exeupon opening it.
Thumbnails[edit | edit source]
Attempting to view photo thumbnails will cause Explorer to crash.
Taskbar[edit | edit source]
Modifications to the system tray settings are saved only after logging off, and will be erased if the user reboots directly.
Windows Media Player[edit | edit source]
The shortcut to the Windows Media Player application erroneously points to its WoW64 counterpart, which only exists in x64 releases of Windows at this point in development.
Multi-core support[edit | edit source]
Only one core is powered up and used by the operating system - multiprocessing support is not implemented in ARM32 Windows at this point in development.
Sysprep[edit | edit source]
Sysprep will fail due to a fault in tssysprep.dll.
buildchk_win8_arm.log[edit | edit source]
BUILD: (TpSubmitQ:ALLOC) PASS:Pass1 NoSync TICK:0
1>Compiling c:\work\ar6002wifi\athlib\host\hif\sdio\windows\src *************
1>'nmake.exe /nologo BUILDMSG=Stop. -i /nologo /f c:\winddk\7792.0.0\bin\makefile.def BUILD_PASS=PASS1 NOLINK=1 NOPASS0=1 THREAD_ID=1 MAKEDIR_RELATIVE_TO_BASEDIR='
Gallery[edit | edit source]
Photos uploaded prior to publication[edit | edit source]
Notes[edit | edit source]
- ↑ 1.0 1.1 If utilizing the quad-core variant of the Tegra 2 WoA fork, the machine configuration in the batch script must be modified to address 2 GB of RAM, and the patched
2gEFI firmware capsules must also be used to start up the virtual machine. Themulti2gcombination can be used to immediately boot into builds 8020 through 8061; if this combination is not being used, then necessary registry modifications against theSYSTEMhive to load Tegra 2 HAL extension IDsVEN_ra2.&DEV_0002(HalExtTegra2.dll) andVEN_ra2.&DEV_0003(HalExtTegra2Dma.dll; in later builds,HalExtTegraDma.dll) are required.
References[edit | edit source]
- ↑ Sinofsky, Steven. 104. //build It and They Will Come (Hopefully), Hardcore Software: Inside the Rise and Fall of the PC Revolution. 30 October 2022.
- ↑ Various Authors. Windows 8 on NVIDIA Tegra running in Microsoft labs, Hardcore Software: Inside the Rise and Fall of the PC Revolution. Late 2010—20 August 2011.


