Windows 8 build 8375
| Build of Windows 8 | |
 | |
| Release name | Developer Preview 7 |
|---|---|
| OS family | Windows NT |
| Version number | 6.2 |
| Build number | 8375 |
| Build revision | 0 |
| Architecture | x86, x64, ARM32 (ARMv7) |
| Build lab | winmain_win8rc |
| Compiled on | 2012-05-04 |
| Expiration date | |
| Timebomb | 2013-01-15 (+256 days) |
| SKUs | |
| Core RT (CoreARM) Pro Enterprise | |
| Product key | |
| CVWV3-RKNBX-3J7X3-H8PYK-DYDPK 2MP7K-98NK8-WPVF3-Q2WDG-VMD98 (alt) BN4FD-28M77-4VJMY-C9R68-XWW48 (RT)[a] | |
| About dialog | |
Windows 8 build 8375 is the official Developer Preview 7 build of Windows 8, released to partners enrolled into the Ecosystem Engineering Access Program on 5 May 2012. The available copy of this build's x86 Enterprise SKU was dumped from a Lenovo ThinkPad Tablet 2 engineering sample and was uploaded on 25 January 2021, whereas the ARMv7 compile was uploaded to BetaWorld on 4 July 2023, and subsequently shared by the aforementioned website on 26 October 2024.
Prior to its public upload, the Core SKU of this build was accidentally pictured in a set of screenshots for the third-party music player Gaana on the Windows Store. A forum thread referencing this build's x64 ISO image filename was posted on the Windows Live Connect forums on 14 May 2012,[1] and several photographs of this build's ARM version running on a NVIDIA Tegra 3 Cardhu Reference Platform were also found on the BetaWorld Wiki.[2] In addition, various binaries related to the ARM32 compile, particularly the Windows Store General Helper Tool used to debug AppX application installation, were found within a disk dump for Windows 8.1 build 9354 (winmain).
Similar to the unidentified December 2011 build, build 8509 and build 9200.16456 (win8_gdr_soc_intel), despite not being publicly released by Microsoft, the standard set of built-in Metro applications is included by default.
ARMv7 compile installation[edit | edit source]
QEMU installation guide:
Prerequisites[edit | edit source]
The following requirements used in order to install this build onto a virtual machine are listed below:
- A copy of QEMU v6.2.0, modified for Windows RT compatibility
- A version of the firmware designed for ARM32 emulation (https://github.com/pivotman319-owo/woahefi-nt6x/releases/tag/r0.01), to be placed in the QEMU installation directory under
fw/QEMU_EFI_woahefi.fd - One virtual hard disk image (for storing the operating system)
Precautions[edit | edit source]
- Certain Windows 8 builds (such as 8330 (fbl_woa) or 8422 (fbl_woa)) may fail to properly load certain binaries on most startup attempts due to an emulation bug that causes the boot environment to read files incorrectly (especially the Hardware Abstraction Layer) causing an invalid checksum error, despite the files themselves being unmodified. This can be worked around by attempting to retry the startup attempt multiple times.
- USB emulation is largely unstable and may result in all input devices failing to register any user inputs. To restore input, switch to the QEMU compatibility monitor (Ctrl+Alt+2) and run the following commands:
device_del kbd
device_add usb-kbd,id=kbd
device_del mice
device_add usb-tablet,id=mice
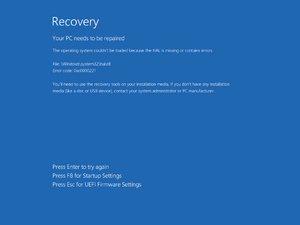
- Multiple BSODs might cause "Preparing Automatic Repair" messages, an early boot error will appear afterwards.
- Currently, builds within the 85xx-9200 range cannot be booted on QEMU because the Hardware Abstraction Layer (HAL) implementation in these builds is not compatible with the current state of the emulated ARM system. This can be resolved by replacing
hal.dllwith the one in 8439 and disabling Driver Signing Enforcement (DSE).
Instructions[edit | edit source]
Create the needed virtual disk image through the diskpart utility by running the below script; they will be created under a directory in the C: drive named ARM8. The partitions it will contain will be respectively mounted under drive letters F and P.
create vdisk file="C:\ARM8\HDD.vhd" maximum=65536 type=expandable
select vdisk file="C:\ARM8\HDD.vhd"
attach vdisk
convert gpt
create partition efi size=100
format quick fs=fat32
assign letter=F
create partition primary
format quick fs=ntfs
assign letter=P
exit
Deploy the image and apply the generic product key from the build's installation media by invoking the following DISM commands, then add the boot files to the EFI partition:
DISM /Apply-Image /ImageFile:"X:\path\to\install.wim" /ApplyDir:P:\ /Index:1
DISM /Image:P:\ /Set-ProductKey:NFV72-RG2HG-7FTTP-8FJTB-FF848 /AcceptEula
bcdboot "P:\Windows" /s F: /f UEFI
Eject the currently attached virtual disk from the machine, then paste and run the contents of the below script onto a batch file within the QEMU installation directory, replacing YYYY-MM-DD with a date which is prior to the build’s built-in timebomb expires.
set MAIN="C:\ARM8\HDD.vhd"

qemu-system-arm ^
    -M virt,force_el3=true,force_psci=true,pci=false,highmem=false ^
    -cpu cortex-a15 -smp cores=4,threads=2 -m 2048 ^
    -device usb-kbd,id=kbd -device usb-tablet,id=mice ^
    -drive id=SD,if=none,file=%MAIN% -device sd-card,drive=SD ^
    -bios fw\QEMU_EFI_woahefi.fd -device VGA ^
    -rtc base=YYYY-MM-DD,clock=vm ^
    --accel tcg,thread=multi
Continue installing the operating system through normal means.
New features and changes[edit | edit source]
- The Windows Fingerprinting Service has been partially re-enabled, compared to build 8370; in this build, it is in a half-way state where the confidentiality warning is displayed across all UI surfaces, but the actual fingerprint/EULA hash data is not displayed. Later builds from this release branch would disable this functionality entirely, only leaving behind a presence check for the WFS fingerprinting blob in the registry and within the OS installation's registry configuration directory (in
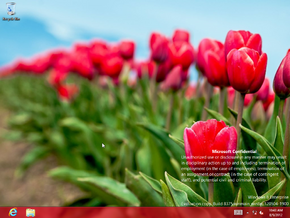
Windows\System32\config). - This is the first available build to use the new default wallpaper seen in the official Release Preview build (originally titled Shorty), albeit with a slightly higher color temperature and saturation.
- The boot screen was changed from the betta fish used in the Consumer Preview to a plain black screen that simply displays the Windows wordmark, and would remain up through build 8509.
- The spacebar key can now be used to dismiss the lock screen.
- The Georgian Ministry of Education and Science Schools keyboard layout has been renamed to Georgian (MES).
- The Windows Media Player logo has been removed from the Corporate skin.
Findings[edit | edit source]
x86 copy[edit | edit source]
As the x86 Enterprise copy of this build was dumped from an engineering sample device sourced from Lenovo, the provided image dump notably includes several development leftovers. These include calibration logs and debugging tools for the device's built-in GPS location sensor (from 5 May 2012 through 9 August 2012) as well as the needed drivers required for full functionality of the ThinkPad 2 such as chipset drivers for the Intel Atom Z2760 SoC, along with internal documentation sourced from Intel, Broadcom and Ericsson development teams.
The Windows Hardware Certification Kit from build 8523 is additionally present in the provided image, and scripts for updating the firmware included as part of hardware components found within the development kit are present in a separate user account named 8375RC. The image is set up to use a key management server from Microsoft's internal corporate network that was made available to partners.
ARM32 copy[edit | edit source]
The ARM32 copy of this build includes a private compile of Internet Explorer 10, version 6.2.8375.0 (winmain_win8rc(darrenda).120517-1502), as well as the Application Certification Kit and Visual Studio remote debugger toolsets targeting OS builds 8378 and 8371, respectively. Tegra 3 HALs and Broadcom sensor and modem drivers from builds 8378 and 8381 are also respectively present in the image.
Bugs and quirks[edit | edit source]
- The task previews in this build do not properly display under software rendering.
Gallery[edit | edit source]
Windows Setup[edit | edit source]
Out-of-box experience[edit | edit source]
Interface[edit | edit source]
Enterprise[edit | edit source]
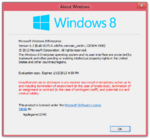
System Properties and
winver
[edit | edit source]
RT (CoreARM)[edit | edit source]
Ditto, with
winverSystem Properties Control Panel applet
Cardhu Reference Platform images[edit | edit source]
[edit | edit source]
Notes[edit | edit source]
- ↑ Preinstalled product key in ARMv7 compile.


