Windows 10 build 21262
| Build of Cobalt | |
 | |
| OS family | Windows 10 (NT 10.0) |
|---|---|
| Version number | 10.0 |
| Build number | 21262 |
| Build revision | 1000 |
| Architecture | ARM64 |
| Build lab | rs_prerelease |
| Compiled on | 2020-11-13 |
| Expiration date | |
| Timebomb | 2021-01-31 (+79 days) |
| SKUs | |
| Pro (China Only, Single Language) Pro Education Pro for Workstations Education Enterprise Enterprise multi-session IoT Enterprise | |
| Product key | |
| Use a Windows 10 Retail serial | |
| About dialog | |

Windows 10 build 21262 is the earliest available build of Cobalt, the 21H2 development semester of Windows as a service. Two photographs of the build running on a Qualcomm Snapdragon 8cx Gen 3 development kit (SC8280X Mobile Test Platform) were first shared onto the DuoWOA Telegram group on 4 August 2023 - additional photographs later appeared within the same group several days later. A modified copy that replaces several components with variants sourced from private builds compiled by Microsoft developers was later shared online on 21 August 2023.
Installation[edit | edit source]
QEMU installation guide:
Prerequisites[edit | edit source]
The following requirements used in order to install this build onto a virtual machine are listed below:
- A 64-bit version of QEMU
- A version of the TianoCore EDK II firmware for ARM64 emulation, to be placed in the QEMU installation directory under
fw/QEMU_EFI.fd - The Red Hat VirtIO driver package
- Virtual hard disk image for OS install
Precautions[edit | edit source]
Remove all Qualcomm drivers first before booting into the build, as the preinstalled image includes a set of drivers specific to the Qualcomm Snapdragon SC8280X processor; an ACPI_BIOS_ERROR bugcheck will occur if this is not done.
Instructions[edit | edit source]
Create the needed virtual disk images through the diskpart utility by running the below script; they will be created under a directory in the C: drive named CO_21262. The partitions it will contain will be respectively mounted under drive letters F and P.
create vdisk file="C:\CO_21262\HDD.vhd" maximum=65536 type=expandable
select vdisk file="C:\CO_21262\HDD.vhd"
attach vdisk
convert gpt
create partition efi size=100
format quick fs=fat32
assign letter=F
create partition primary
format quick fs=ntfs
assign letter=P
exit
Deploy the WIM image, mount the VirtIO driver disc image, install the Windows 11-specific VirtIO storage driver by invoking the following DISM commands, then disable Hypervisor-Enforced Code Integrity (to prevent a deadlock on boot), add the boot files to the EFI partition and modify the associated boot configuration data:
rem Apply the image and install the VirtIO storage driver
DISM /Apply-Image /ImageFile:"X:\path\to\Windows10Pro_Dev_21262.1000-arm64-sc8280x.wim" /ApplyDir:P:\ /Index:1
DISM /Image:P:\ /Add-Driver /Driver:"Y:\viostor\w11\ARM64\viostor.inf"

rem Fix a Hyper-V deadlock during boot - having this value on will prevent the OS from booting and may cause a CPU triple fault!
reg load HKLM\HVCISYSTEMFIX P:\Windows\System32\config\SYSTEM
reg add "HKLM\HVCISYSTEMFIX\ControlSet001\Control\DeviceGuard\Scenarios\HypervisorEnforcedCodeIntegrity" /t REG_DWORD /v Enabled /d 0 /f
reg unload HKLM\HVCISYSTEMFIX

rem Make system bootable, enable test code signing and disable Code Integrity
bcdboot "P:\Windows" /s F: /f UEFI
bcdedit /store F:\EFI\Microsoft\Boot\BCD /set {default} HYPERVISORLAUNCHTYPE OFF
bcdedit /store F:\EFI\Microsoft\Boot\BCD /set {default} TESTSIGNING ON
bcdedit /store F:\EFI\Microsoft\Boot\BCD /set {default} NOINTEGRITYCHECKS ON
Eject the currently attached virtual disk from the machine, then paste and run the contents of the below script onto a batch file within the QEMU installation directory:
set MAIN="C:\CO_21262\HDD.vhd"

qemu-system-aarch64 ^
    -M virt,virtualization=true -cpu cortex-a72 -smp cores=4,threads=2 -m 4096 ^
    -device qemu-xhci -device usb-kbd -device usb-tablet ^
    -hda %MAIN% ^
    -bios fw\QEMU_EFI.fd -device ramfb ^
    -rtc base=2020-11-14,clock=vm ^
    --accel tcg,thread=multi
Private builds of core components[edit | edit source]
The available copy is specific in that the kernel (ntoskrnl.exe), hardware abstraction layer (hal.dll) and hypervisor (hvaa64.exe) binaries have been replaced by private builds of these components compiled by two Microsoft employees. It is currently unknown what changes have been made in the replaced components. The original rs_prerelease kernel and HAL are still present within the recovery environment image.
The privately built components include the following build tags:
10.0.21262.1000 (GitEnlistment(alegre).201130-1047)-ntoskrnl.exeandhal.dll10.0.21262.1000 (GitEnlistment(luish).201203-1259)-hvaa64.exein\Windows\WinSxS\arm64_microsoft-hyper-v-drivers-hypervisor_31bf3856ad364e35_10.0.21262.1000_none_f6ce11f1de74d3d210.0.21262.1000 (GitEnlistment(luish).201210-1059)-hvaa64.exein\Windows\System32
New features and changes[edit | edit source]
XtA (x64-to-ARM) emulation[edit | edit source]
AMD64 CPU emulation (colloquially referred to as x64-to-ARM, or simply XtA) has been implemented for ARM64 builds; the feature itself would be later publicly announced by Microsoft in a public blog post released alongside build 21277.[1] Unlike WoW64 and the previous x86 emulation, the new emulator does not use a separate System directory with x64-compatible binaries. Instead, existing ARM64 binaries in %windir%\System32 have been extended with x64-compatible code; such executables are referred to as ARM64X executables.[2] The implementation in this build requires the user to download a preview version of the C++ runtime, a requirement that would be later removed in build 21318.
User interface[edit | edit source]
The Start menu has been updated to support displaying items at the parent directory level if there is only one shortcut item in a program group.
Registry Editor dialog windows have been updated to support use of the Ctrl+Backspace ← key stroke to remove individual words.
Applications[edit | edit source]
The Xbox Console Companion has been replaced by a new version of the Xbox app; in addition, the Microsoft Wallet application has been deprecated and can no longer be installed by users.
Bugs[edit | edit source]
- The modernized Disk Management Settings sub-page located within the Storage category fails to properly list all available disks and volumes. The legacy Disk Management tool (
diskmgmt.msc) may instead be used to manage disks as a workaround.
Gallery[edit | edit source]
Interface[edit | edit source]
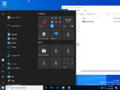
Parent-level start menu shortcut display
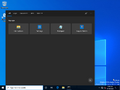
Search
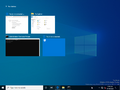
Task View
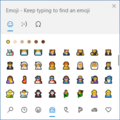
Emoji picker


[edit | edit source]
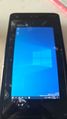
Qualcomm Snapdragon 8cx Gen 3 development kit running said build

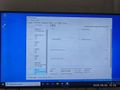
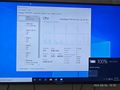
Task Manager photographs[edit | edit source]
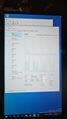
CPU page
Ditto.
GPU page
Ditto.


References[edit | edit source]
- ↑ Pulapaka, Hari. Introducing x64 emulation in preview for Windows 10 on ARM PCs to the Windows Insider Program, Windows Insider Blog. 10 December 2020.
- ↑ https://twitter.com/never_released/status/1337464139166478336