10.0.14901.1000.rs_onecore_base_sc.160809-1841|
 |
| OS family | Windows 10 (NT 10.0) |
|---|
| Version number | 10.0 |
|---|
| Build number | 14901 |
|---|
| Build revision | 1000 |
|---|
| Architecture | ARM64 |
|---|
| Build lab | rs_onecore_base_sc |
|---|
| Compiled on | 2016-08-09 |
|---|
|
| Timebomb | 2016-10-01 (+53 days) |
|---|
|
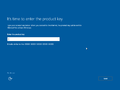
| ARM64 Server |
|
| DP3NW-RXVQ6-79BFR-VBX83-TCQT8 |
|
|
|
Windows Server build 14901 is a post-RTM build of Windows Server 2016. This build is only available in the ARM64 architecture. It is the last available build of Windows Server where flight-signed binaries cannot boot after certificate expiration.
Expand
QEMU installation guide:
The following requirements used in order to install this build onto a virtual machine are listed below:
Create the needed virtual disk images through the diskpart utility by running the below script; they will be created under a directory in the C: drive named ServerARM64. The images and the partitions they contain will be respectively mounted under drive letters M and P.
create vdisk file="C:\ServerARM64\install.vhd" maximum=4096 type=expandable
select vdisk file="C:\ServerARM64\install.vhd"
attach vdisk
convert gpt
create partition primary
format quick fs=fat32
assign letter=M
create vdisk file="C:\ServerARM64\HDD.vhd" maximum=65536 type=expandable
select vdisk file="C:\ServerARM64\HDD.vhd"
attach vdisk
convert gpt
create partition efi size=100
format quick fs=fat32
create partition primary
format quick fs=ntfs
assign letter=P
exit
Copy the contents of the installation media over to partition M, followed by the contents of the SCSI disk controller driver directory within the VirtIO driver package (located in viostor\w10\ARM64). Eject all currently attached virtual disks from the machine, and paste and run the contents of the below script (replacing YYYY-MM-DD with the build's compilation date) onto a batch file within the QEMU installation directory:
qemu-system-aarch64 ^
    -M virt,highmem=false -cpu cortex-a72 -smp cores=4,threads=2 -m 2048 ^
    -device qemu-xhci -device usb-kbd -device usb-tablet ^
    -hda C:\ServerARM64\HDD.vhd ^
    -hdb C:\ServerARM64\install.vhd ^
    -bios fw\QEMU_EFI.fd -device ramfb ^
    -rtc base=YYYY-MM-DD,clock=vm ^
    --accel tcg,thread=multi
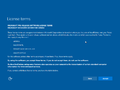
Load the VirtIO SCSI disk controller driver at the partition selection page and continue installation through normal means.
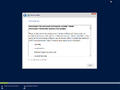
End-user license agreement


.png)


