Windows 10 build 20241.1000
| Build of Iron | |
 | |
| OS family | Windows 10 (NT 10.0) |
|---|---|
| Version number | 10.0 |
| Build number | 20241 |
| Build revision | 1000 |
| Architecture | x86, x64, ARM64 |
| Build lab | rs_prerelease |
| Compiled on | 2020-10-16 |
| Expiration date | |
| Timebomb | 2021-01-31 (+107 days) |
| SKUs | |
| Home (N, Single Language, China) Pro (N, Single Language, China) Pro Education (N) Pro for Workstations (N) Education (N) Enterprise (G, N) Enterprise Evaluation (N) Enterprise multi-session IoT Enterprise Team | |
| Product key | |
| Use a Windows 10 Retail serial | |
| About dialog | |

Windows 10 build 20241.1000 is the eighteenth Insider Preview build of Iron, the 21H1 development semester of Windows as a service. This build was released to Windows Insiders in the Dev Channel on 21 October 2020. Two days prior to this build's release, a screenshot of this build was shown by a Microsoft employee on GitHub on 19 October 2020.[1]
Changes[edit | edit source]
Some of these changes were only available to a small group of Insiders, meaning that not everyone was seeing them right out of the box. They're completely enabled on both upgrades and clean installations since Cobalt build 21332.
- Theme-aware splash screens, which were first spotted as a hidden feature in build 20226, are now enabled by default on some upgrades. Due to its controlled rollout, they're still disabled on clean installations, where the enablement process is the same as 20226.
- Removed the Japanese Address and Rinna candidate suggestion services from the Japanese IME.
- Drive Optimizer improvements:
- An Advanced View checkbox was added, which could show more hidden volumes when selected.
- More information was introduced to explain why some drives can't be optimized, such as File system or partition type not supported.
- Support for using the F5 key to refresh the drives list has been added.
New OOBE updates[edit | edit source]
While the new Out of Box Experience first spotted in build 20226 is still hidden in this build, it has been updated with the following changes:
- The background is no longer blank, and it is similar to that used in Windows 10X.
- Performance without graphics drivers has been improved. While some animations are still somewhat laggy, the time when switching from one page to another has been reduced by this point.
- The keyboard input bug has been fixed.
Bugs[edit | edit source]
- The update process to this build has a chance of hanging for extended periods of time.
- Live preview doesn't work for pinned site tabs on some machines, a gray window is seen instead of the intended content.
- There's a chance of randomly encountering a BSOD with the error code
KMODE_EXCEPTIONwhen using certain virtualization technologies. - There's a chance of randomly encountering a
DPC_WATCHDOG_VIOLATIONBSOD. - There's a chance of randomly encountering a
DRIVER_IRQL_NOT_LESS_OR_EQUALBSOD withtcpip.sys. - Devices running Malwarebytes Web Protection are no longer able to connect to the Internet. To workaround this issue, disable the feature from the Malwarebytes dashboard.
- On some PCs, the taskbar is obscuring the Power button in the Start menu blocking the access to its options. To workaround this issue, use the options from the User menu (⊞ Win+X).
- GPU Compute scenarios, such as using CUDA and DirectML, are not working inside of the Windows Subsystem for Linux.
- Windows PowerShell does not work on the ARM64 versions of this build. To use the app, open up “Windows PowerShell (x86)” or “Windows PowerShell ISE (x86)”, which is located on the Start menu instead.
- Installing games downloaded from the Microsoft Store to a secondary drive that has no OS on it will result in the secondary drive becoming inaccessible. To prevent this bug from occurring, the default storage location for new content must be changed prior to installing the game. This can be done by navigating to Settings → Storage → Change where new content is saved.
- The Advanced View feature for Drive Optimizer is still at an early state, and clicking it will do nothing. It is working properly as of build 20270.
Installation[edit | edit source]
- Some UUP-converted ISOs of this build have a bug that causes setup to encounter an error when attempting to start setup normally. This includes the copies stored on the BetaArchive FTP server. To bypass it, you must follow the instructions below.
In the guide below, "#" signifies the drive where the mounted ISO is located in setup, while "%" indicates an index in
install.wimthat is listed by the dism /get-wiminfo command, while "X" is the drive (usually "C") that the operating system is being installed to, and "?" is the volume that contains the majority of the disk space.
- Create a VM in VMware as you normally would, but use UEFI instead of BIOS.
- Start the setup using an ISO of a different build. Proceed normally until you arrive to the drive partition page. Once you're on that page, click on the New button, then click on Apply, then click on OK on the message that appears. After setup creates the partition, insert the affected ISO and then restart the VM.
- Once you are back on 20241, press ⇧ Shift+F10 to open up Command Prompt.
- Type in
diskpart. Whendiskpartopens, type inlist volto list the volumes. Assign a drive letter to the volume whose file system is marked as "RAW". This can be done by typing inselect volume ?("?" being the number of the volume that usually contains the majority of disk space), then typing inassign. - After assigning a drive letter, check the drive letter assignment by entering in
list volume. - Exit
diskpart. - After exiting
diskpart, format the drive by typing informat x: /fs:NTFS, then apply the installation image by using DISM. It is recommended to check the list of SKUs that you want by typing indism /get-wiminfo /wimfile:#:\sources\install.wim. - Start the installation by using
dism /apply-image /imagefile:#:\sources.install.wim /index:% /applydir:X:\ - After DISM finishes copying the files, use
bcdboot X:\Windowsto create the boot records on the drive that it was installed on. - Restart the VM after all the aforementioned steps are done, and if done correctly, it will proceed like a normal install.
Gallery[edit | edit source]
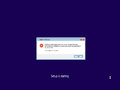
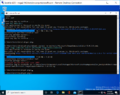
The setup error that occurs on some UUP-generated ISOs of this build

Theme-aware splash screens in light mode
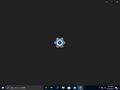
Theme-aware splash screens in dark mode
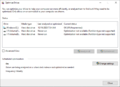
Drive Optimizer
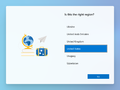
The new Out of Box Experience (OOBE)


GitHub[edit | edit source]
Screenshot shown prior to this build's release
